Easy Amigurumi Mushroom: Step-by-Step Free Crochet Pattern
These tiny mushrooms have a firm, squishy texture that makes them satisfying to hold. Their rounded caps and sturdy stems turn leftover cotton yarn scraps into a woodland-inspired display in under two hours. Beginners appreciate how the work stays small and manageable, while seasoned crafters enjoy the meditative rhythm of simple increases and decreases. You will master the adjustable loop method to keep your centers closed tight, ensuring no fiberfill ever escapes from your finished piece. Whether you want to add a quirky touch to your bookshelves or create a handmade toy for a child, this project is a joy to crochet.
Why Crocheters Love It
The Amigurumi Mushroom is a delightful project that uses basic increases and decreases to create a whimsical, rounded shape. Its compact size makes it an excellent candidate for using up small amounts of leftover cotton yarn from larger projects. Because it works up in under two hours, you can create an entire forest of mushrooms in various colors for home decor or play. The simple construction means you do not have to worry about complex color changes mid-row, allowing you to focus on achieving uniform, tight tension that keeps the stuffing from peaking through your stitches.
This mushroom pattern is so straightforward that I finished a whole set for my niece in a single afternoon. The instructions for the stem were very easy to follow and the final piece looks professional.
— Sarah, beginner crafter
Pattern Overview & Skill Level
- Skill Level: Beginner
- Approximate Time: 1.5 to 2 hours
- Construction: Amigurumi method using continuous rounds, starting from the center of the cap and the base of the stem.
- Finished Dimensions & Sizing: 3 inches tall by 3 inches wide.
Materials & Supplies Needed
- Yarn: Worsted weight (#4) cotton yarn, approximately 20 yards of red for the cap and 15 yards of white for the stem.
- Hook Size: 3.5 mm (E-4) crochet hook to ensure a tight gauge.
- Notions needed: Tapestry needle, stitch marker, fiberfill stuffing, and scissors.
- Safe yarn substitutions: Acrylic yarn of the same weight will result in a slightly larger and softer finished item; do not use wool as it may felt over time during frequent handling.
Stitch Guide & Abbreviations (US Terms)
- MR: Magic Ring
- ch: Chain
- sc: Single crochet
- inc: Increase (2 sc in the same stitch)
- dec: Decrease (sc2tog, inserting hook in front loops only)
- st(s): Stitch(es)
- sl st: Slip stitch
- FO: Fasten off
Step-by-Step Pattern Instructions
Mushroom Cap
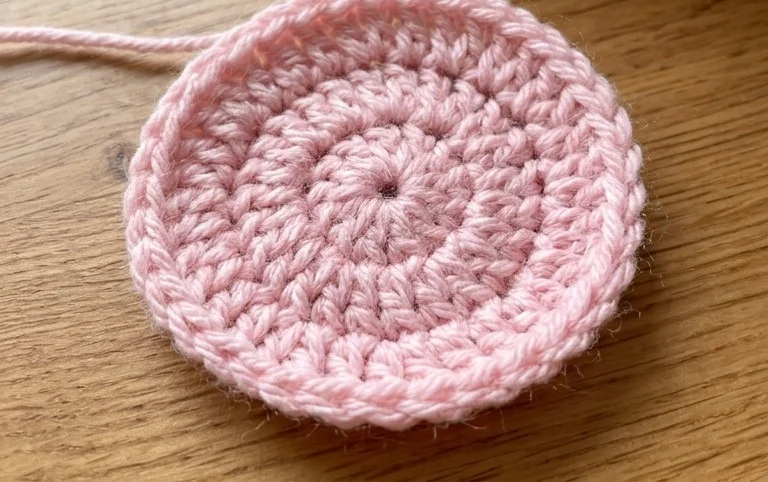
- Rnd 1: 6 sc in MR (6 sts).
- Rnd 2: Inc in each st around (12 sts).
- Rnd 3: [Sc, inc] 6 times (18 sts).
- Rnd 4: [2 sc, inc] 6 times (24 sts).
- Rnd 5: [3 sc, inc] 6 times (30 sts).
- Rnds 6-9: Sc in each st around (30 sts).
- Rnd 10: [3 sc, dec] 6 times (24 sts).
- Rnd 11: [2 sc, dec] 6 times (18 sts). FO and leave a long tail for sewing.
Mushroom Stem
- Rnd 1: 6 sc in MR (6 sts).
- Rnd 2: Inc in each st around (12 sts).
- Rnds 3-7: Sc in each st around (12 sts).
- Rnd 8: [2 sc, dec] 3 times (9 sts).
- Rnd 9: Sc in each st around (9 sts).
- FO and leave a long tail. Stuff the stem firmly.
Assembly
Position the stem centered on the underside of the mushroom cap. Use the remaining yarn tail from the stem to whip stitch the top of the stem to the bottom of the cap. Before closing the final stitches, add enough fiberfill to the cap so it holds a rounded shape. Weave in all remaining ends inside the body of the mushroom.
Care & Washing Instructions
- Hand wash in cool water with a mild detergent to maintain the shape of the fiberfill.
- Lay flat on a clean towel to air dry, turning the mushroom occasionally to ensure even evaporation.
- Gently squeeze and reshape the mushroom while damp to remove any indentation from storage or shipping.
Pro Tips & Common Mistakes to Avoid
Consistent tension is the most important factor in amigurumi; if your stitches are loose, the stuffing will show through the gaps. To keep track of your rounds, always place a stitch marker in the first stitch of every round. Weave in your yarn tails by pulling them through the center of the item rather than leaving them on the surface, which hides the knot and prevents the ends from poking out. If you wish to make a larger mushroom, increase the number of rounds in the cap section before starting the decreases, noting that you will need approximately 20% more yarn for every half-inch increase in diameter.
Frequently Asked Questions
Can I use a larger hook for this pattern?
Using a larger hook will result in a larger finished item with looser stitches, which may cause the fiberfill to show through. It is recommended to use the smallest hook possible that allows you to maintain consistent tension.
Is this pattern suitable for complete beginners?
Yes, this pattern uses only single crochet, increases, and decreases, making it ideal for someone who has just learned the basic stitches and is ready to try a 3D project.
How do I adjust the size of the mushroom?
To make the mushroom smaller, stop the increase rounds early and adjust the decrease rounds accordingly. To make it larger, continue the increase rounds until you reach your desired width before working even rounds.
Am I allowed to sell items made from this pattern?
You are welcome to sell finished items created from this design as long as you credit the original pattern designer in your listing. Mass production of these items is not permitted.
Your new mushroom collection looks great displayed in groups on a wooden tray or tucked into a houseplant pot. You can easily scale this project by using a bulky weight yarn and a larger hook to create a supersized decorative pillow for your sofa. Share a photo of your finished work with the community online to show off your unique color choices. If you enjoyed this project, browse the rest of our pattern library for more quick toys and home items you can finish in an afternoon.